Connect your channels
This is the most important setup job in the platform. Every feature you’re excited about sits downstream of these connections: the AI can’t answer an Instagram message it can’t see, your emails can’t build trust from a spam folder, and Missed-Call Text-Back can’t text from a number that doesn’t exist yet.
Four connections, in this order: email, phone, Google, social.
1. Email (sending domain)
Section titled “1. Email (sending domain)”For your emails to land in inboxes instead of spam folders, the internet needs proof that Momentum-AI is allowed to send on your behalf. That proof lives in your domain settings — the place you bought your website address (GoDaddy, 123-Reg, Ionos, Wix, and so on).
-
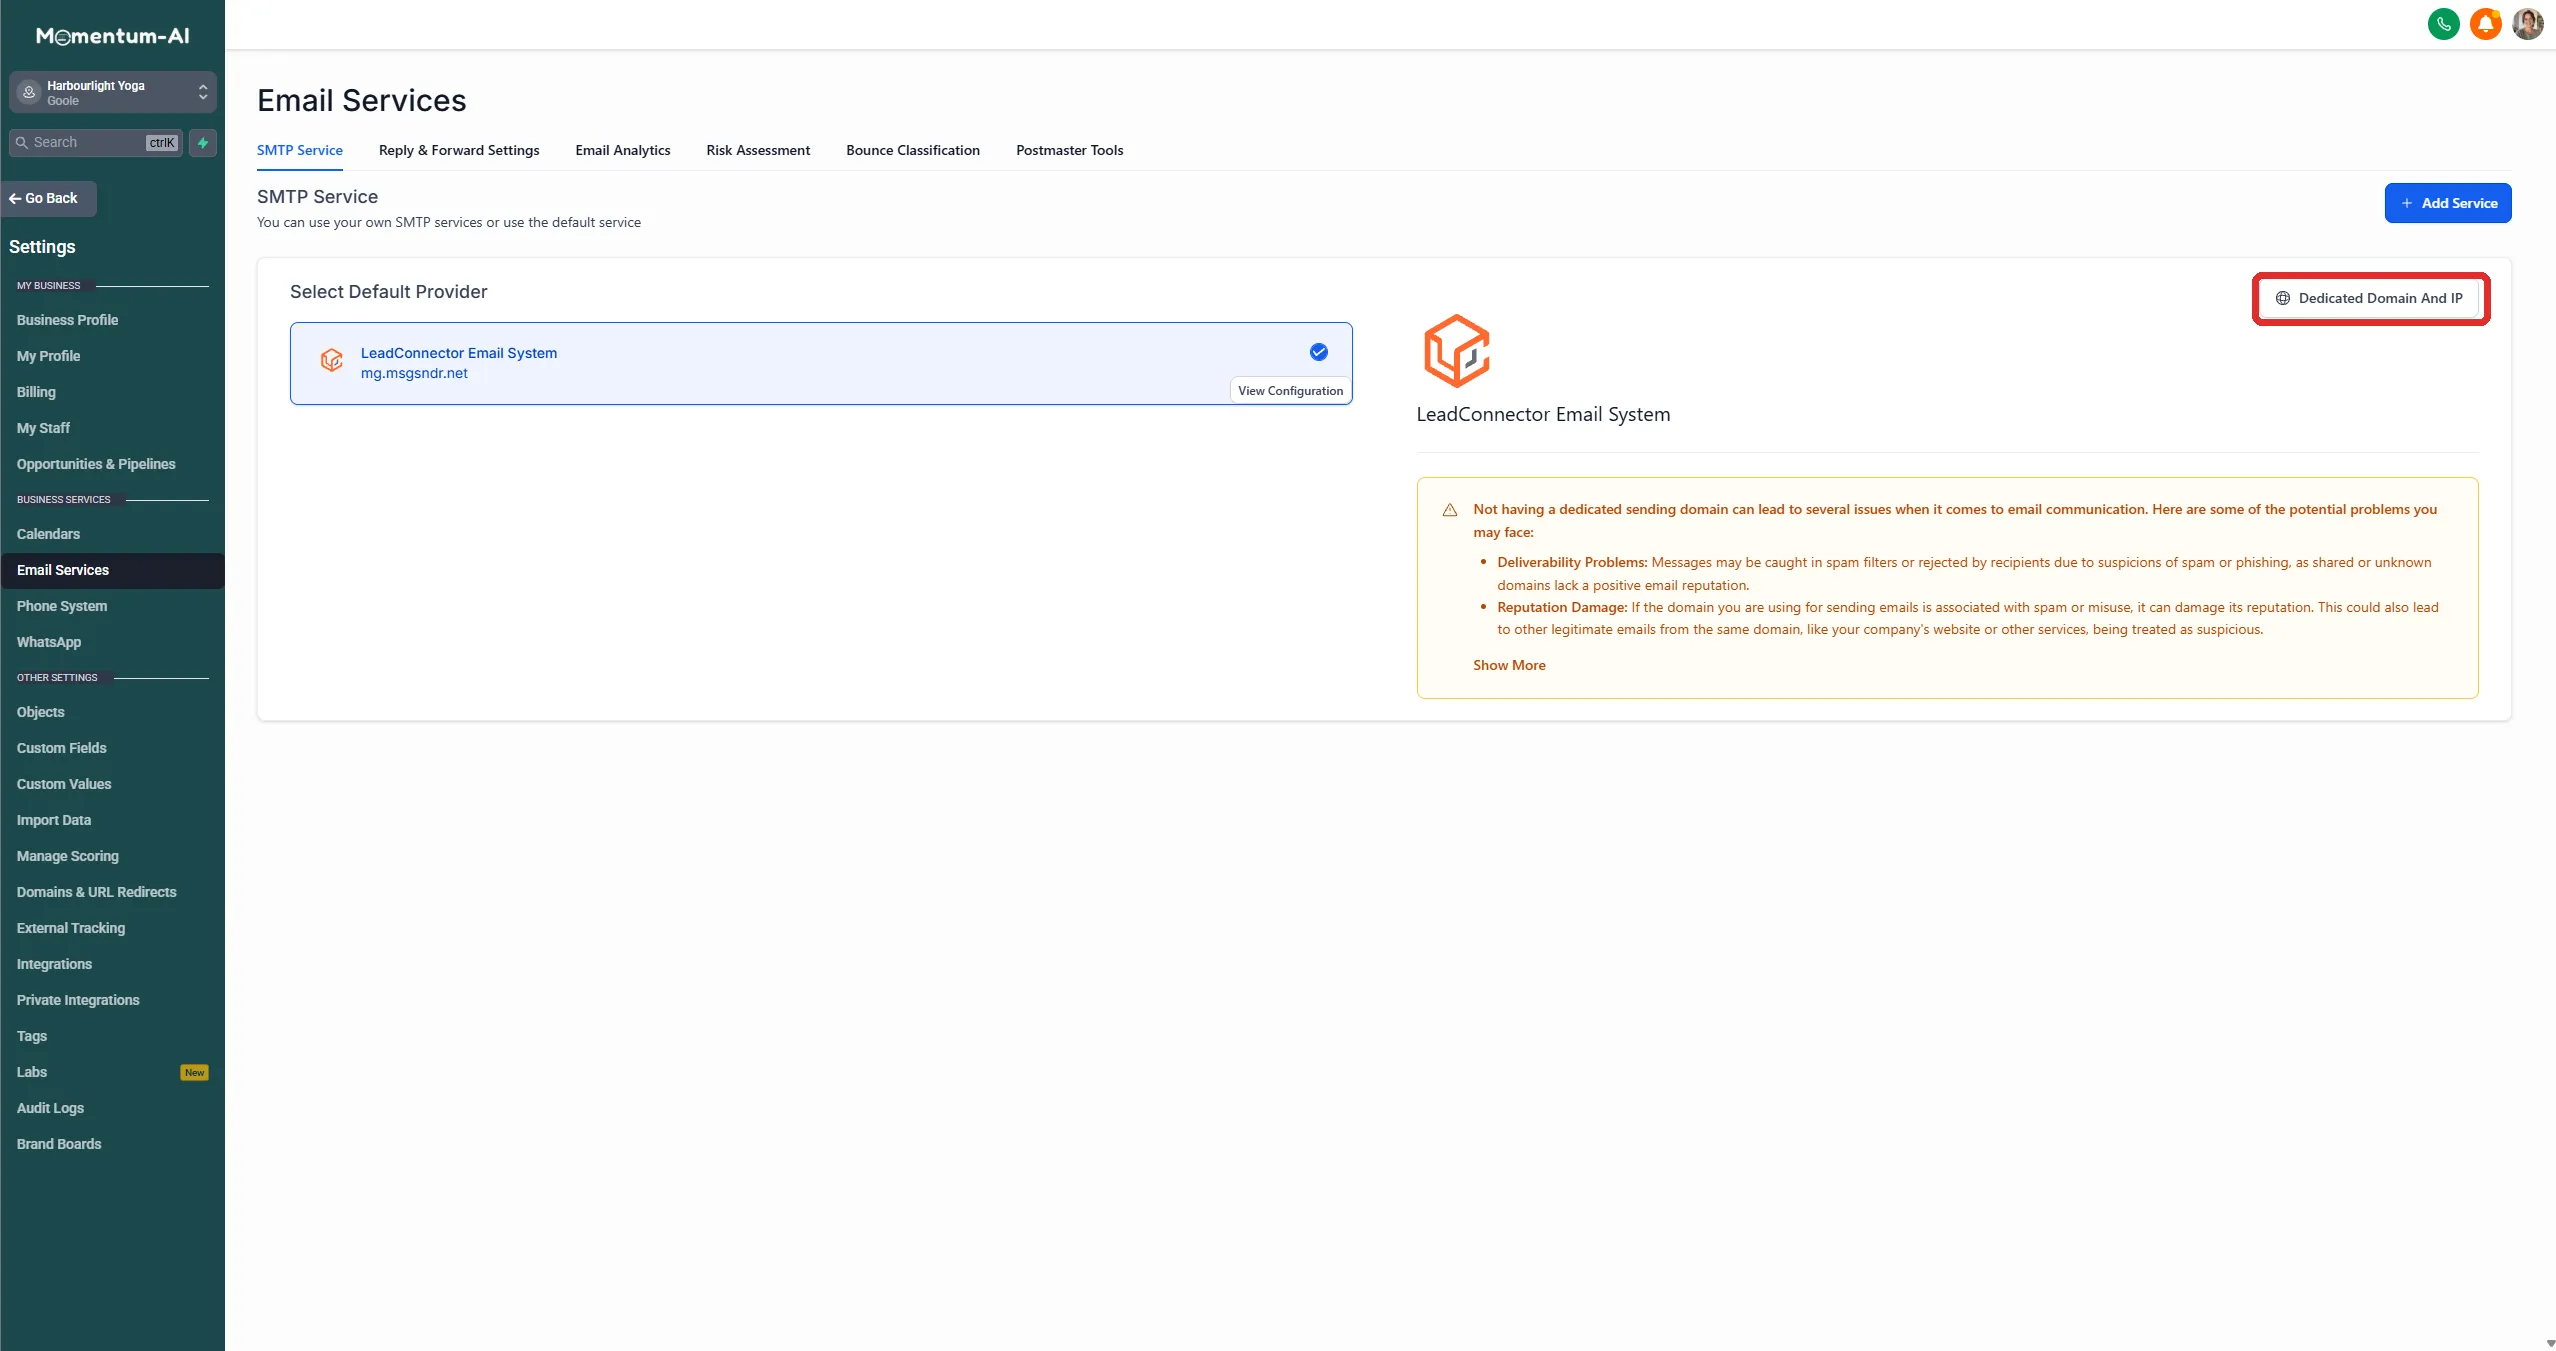
Go to Settings → Email Services and start the domain setup.
-
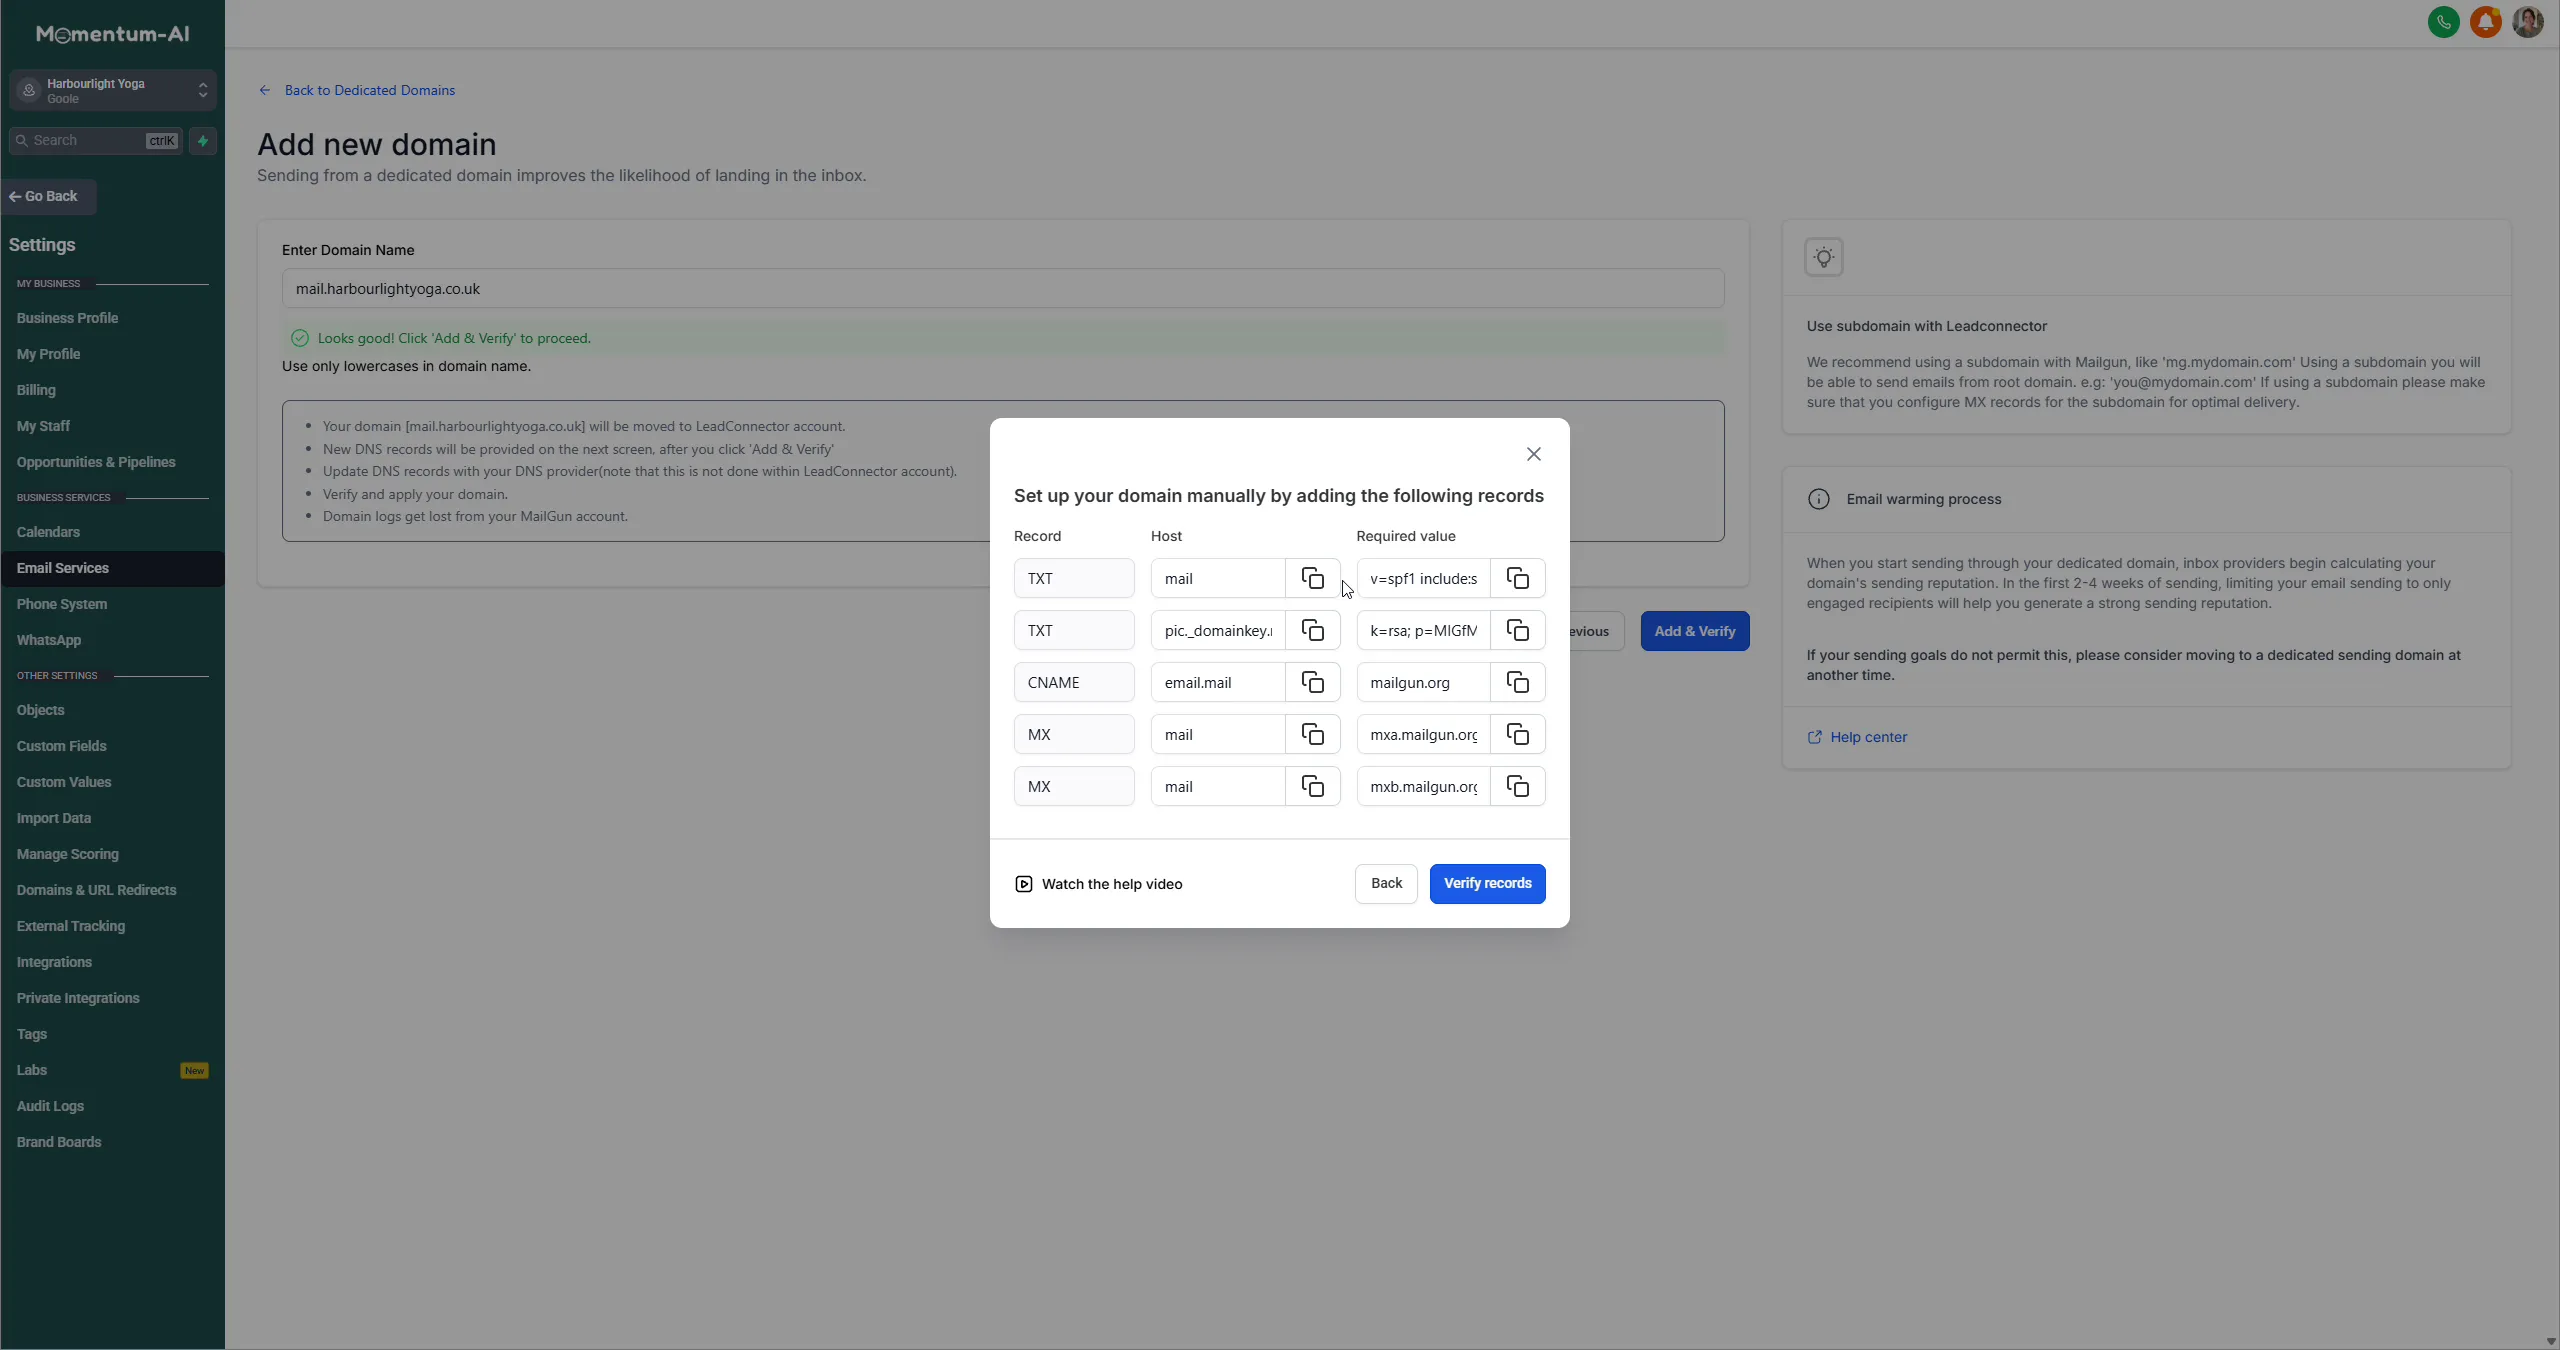
The platform shows you a short list of records to copy across. You’ll see names like DKIM — you don’t need to know what they mean.
-
Copy and paste each record into your domain provider’s DNS settings, the same way you’d copy a postcode into a sat nav.
-
Come back and verify.
2. Your phone number
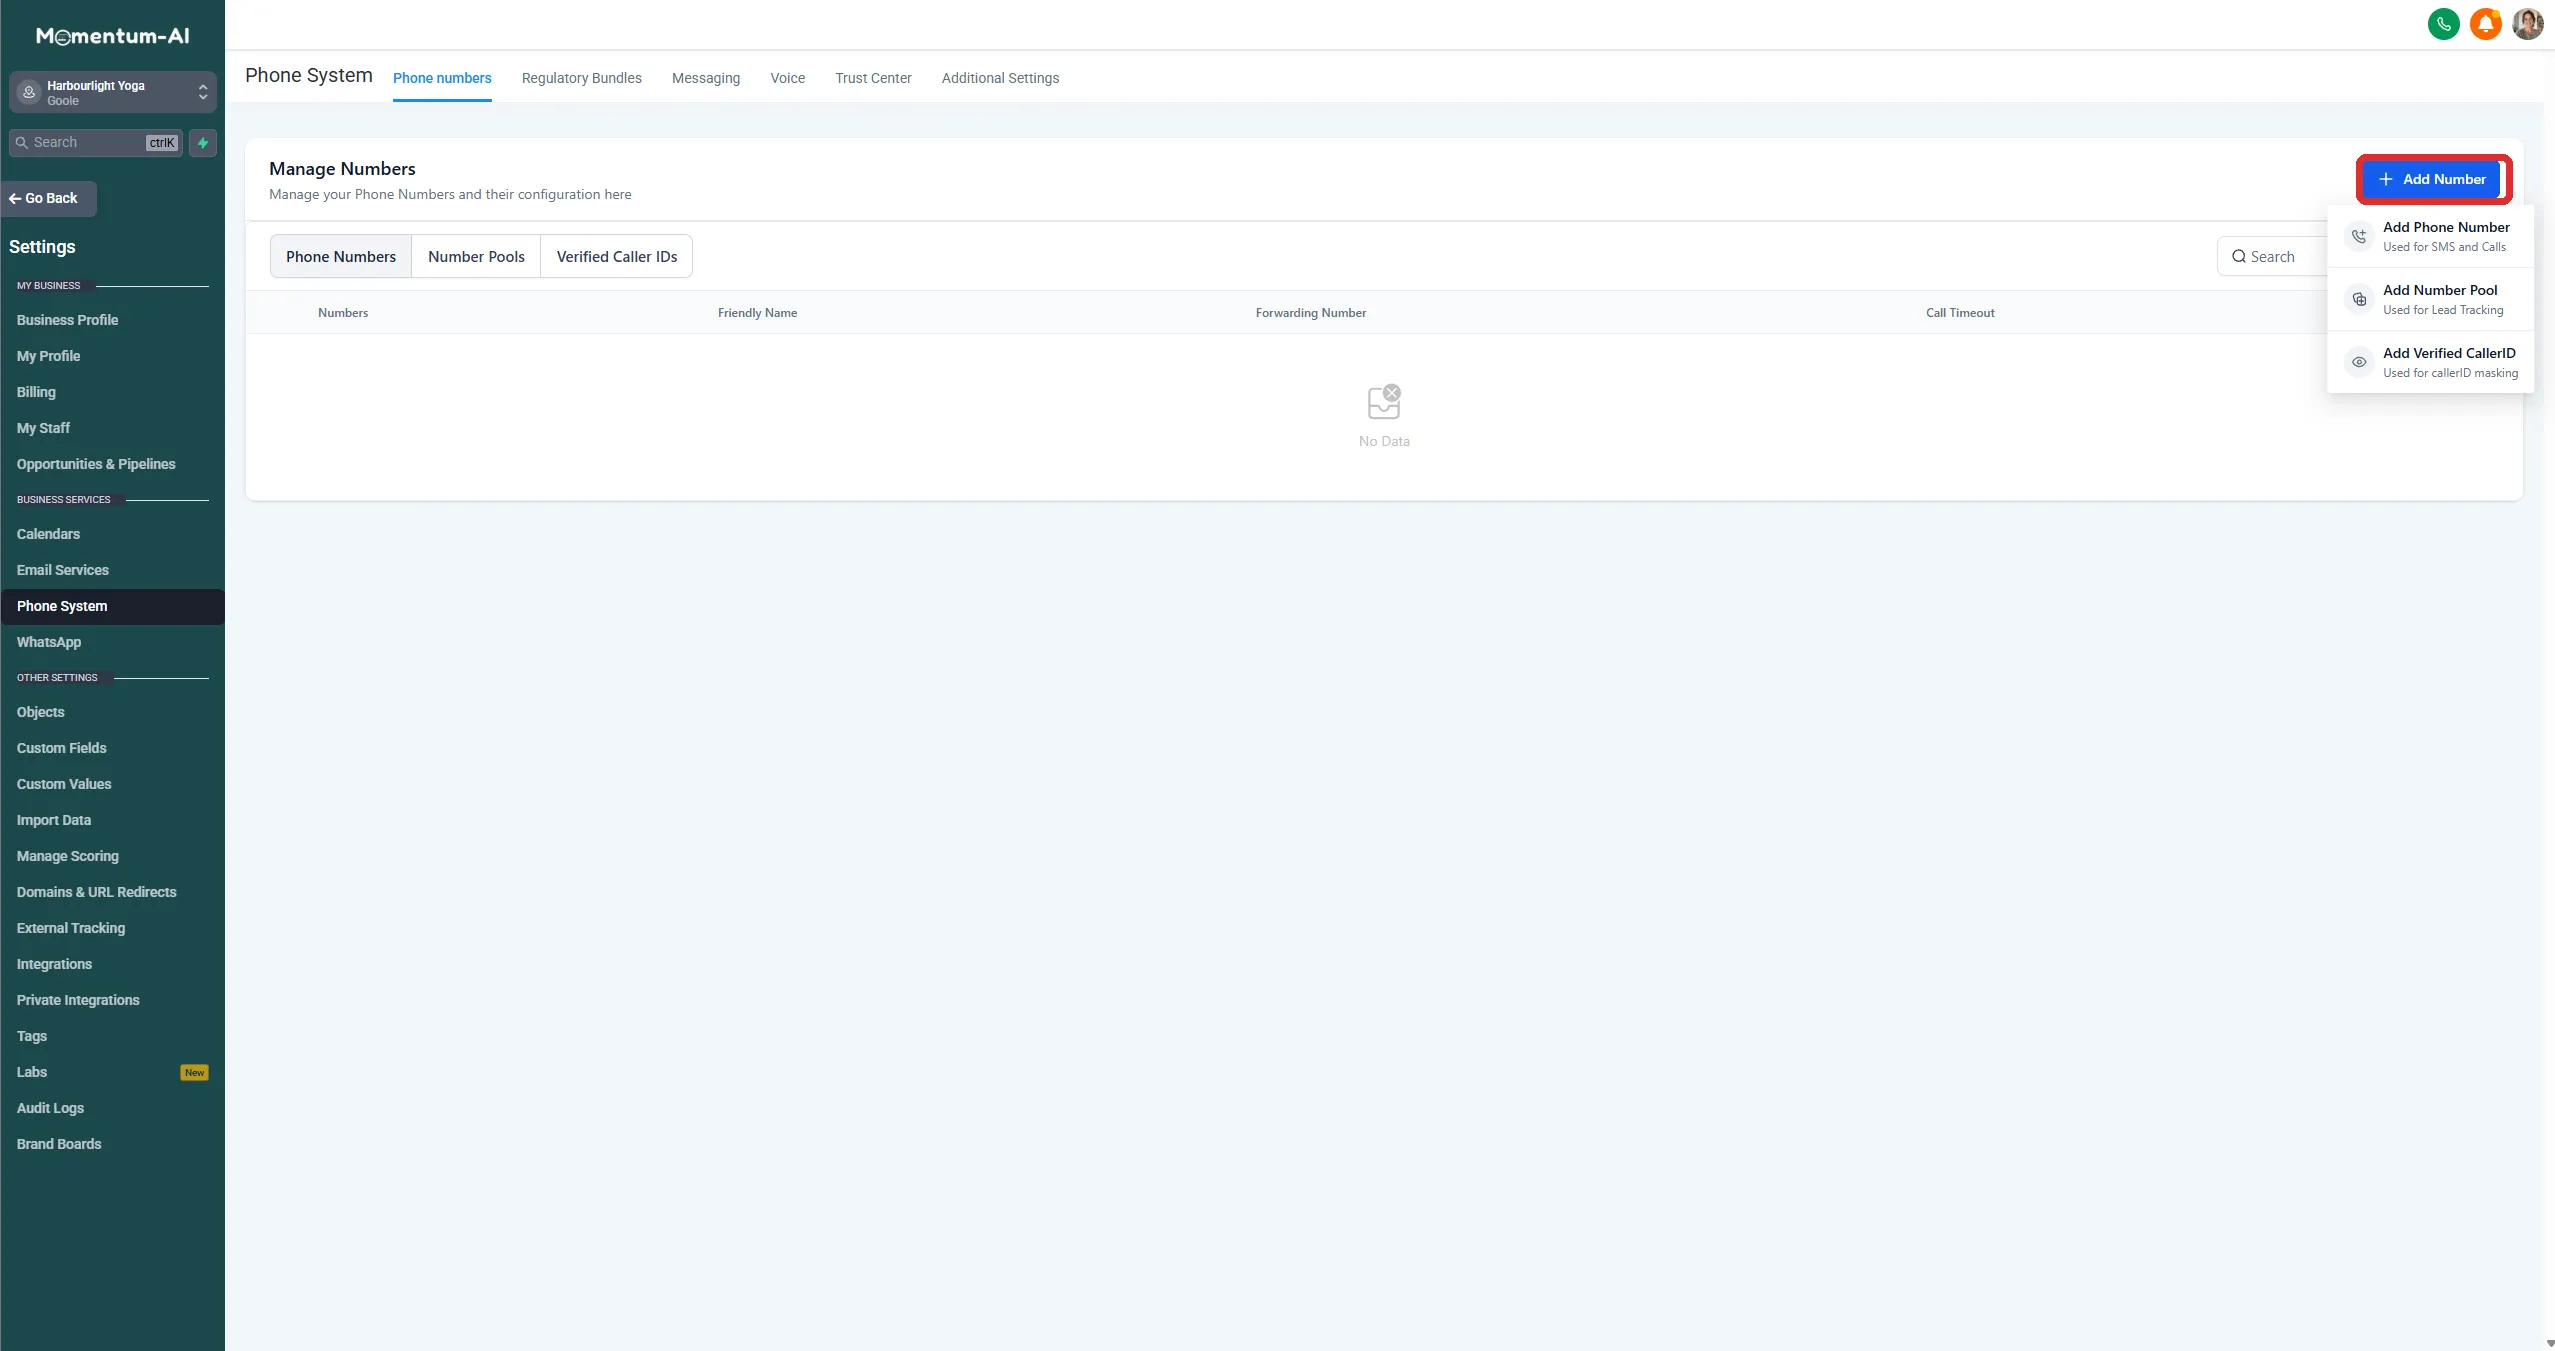
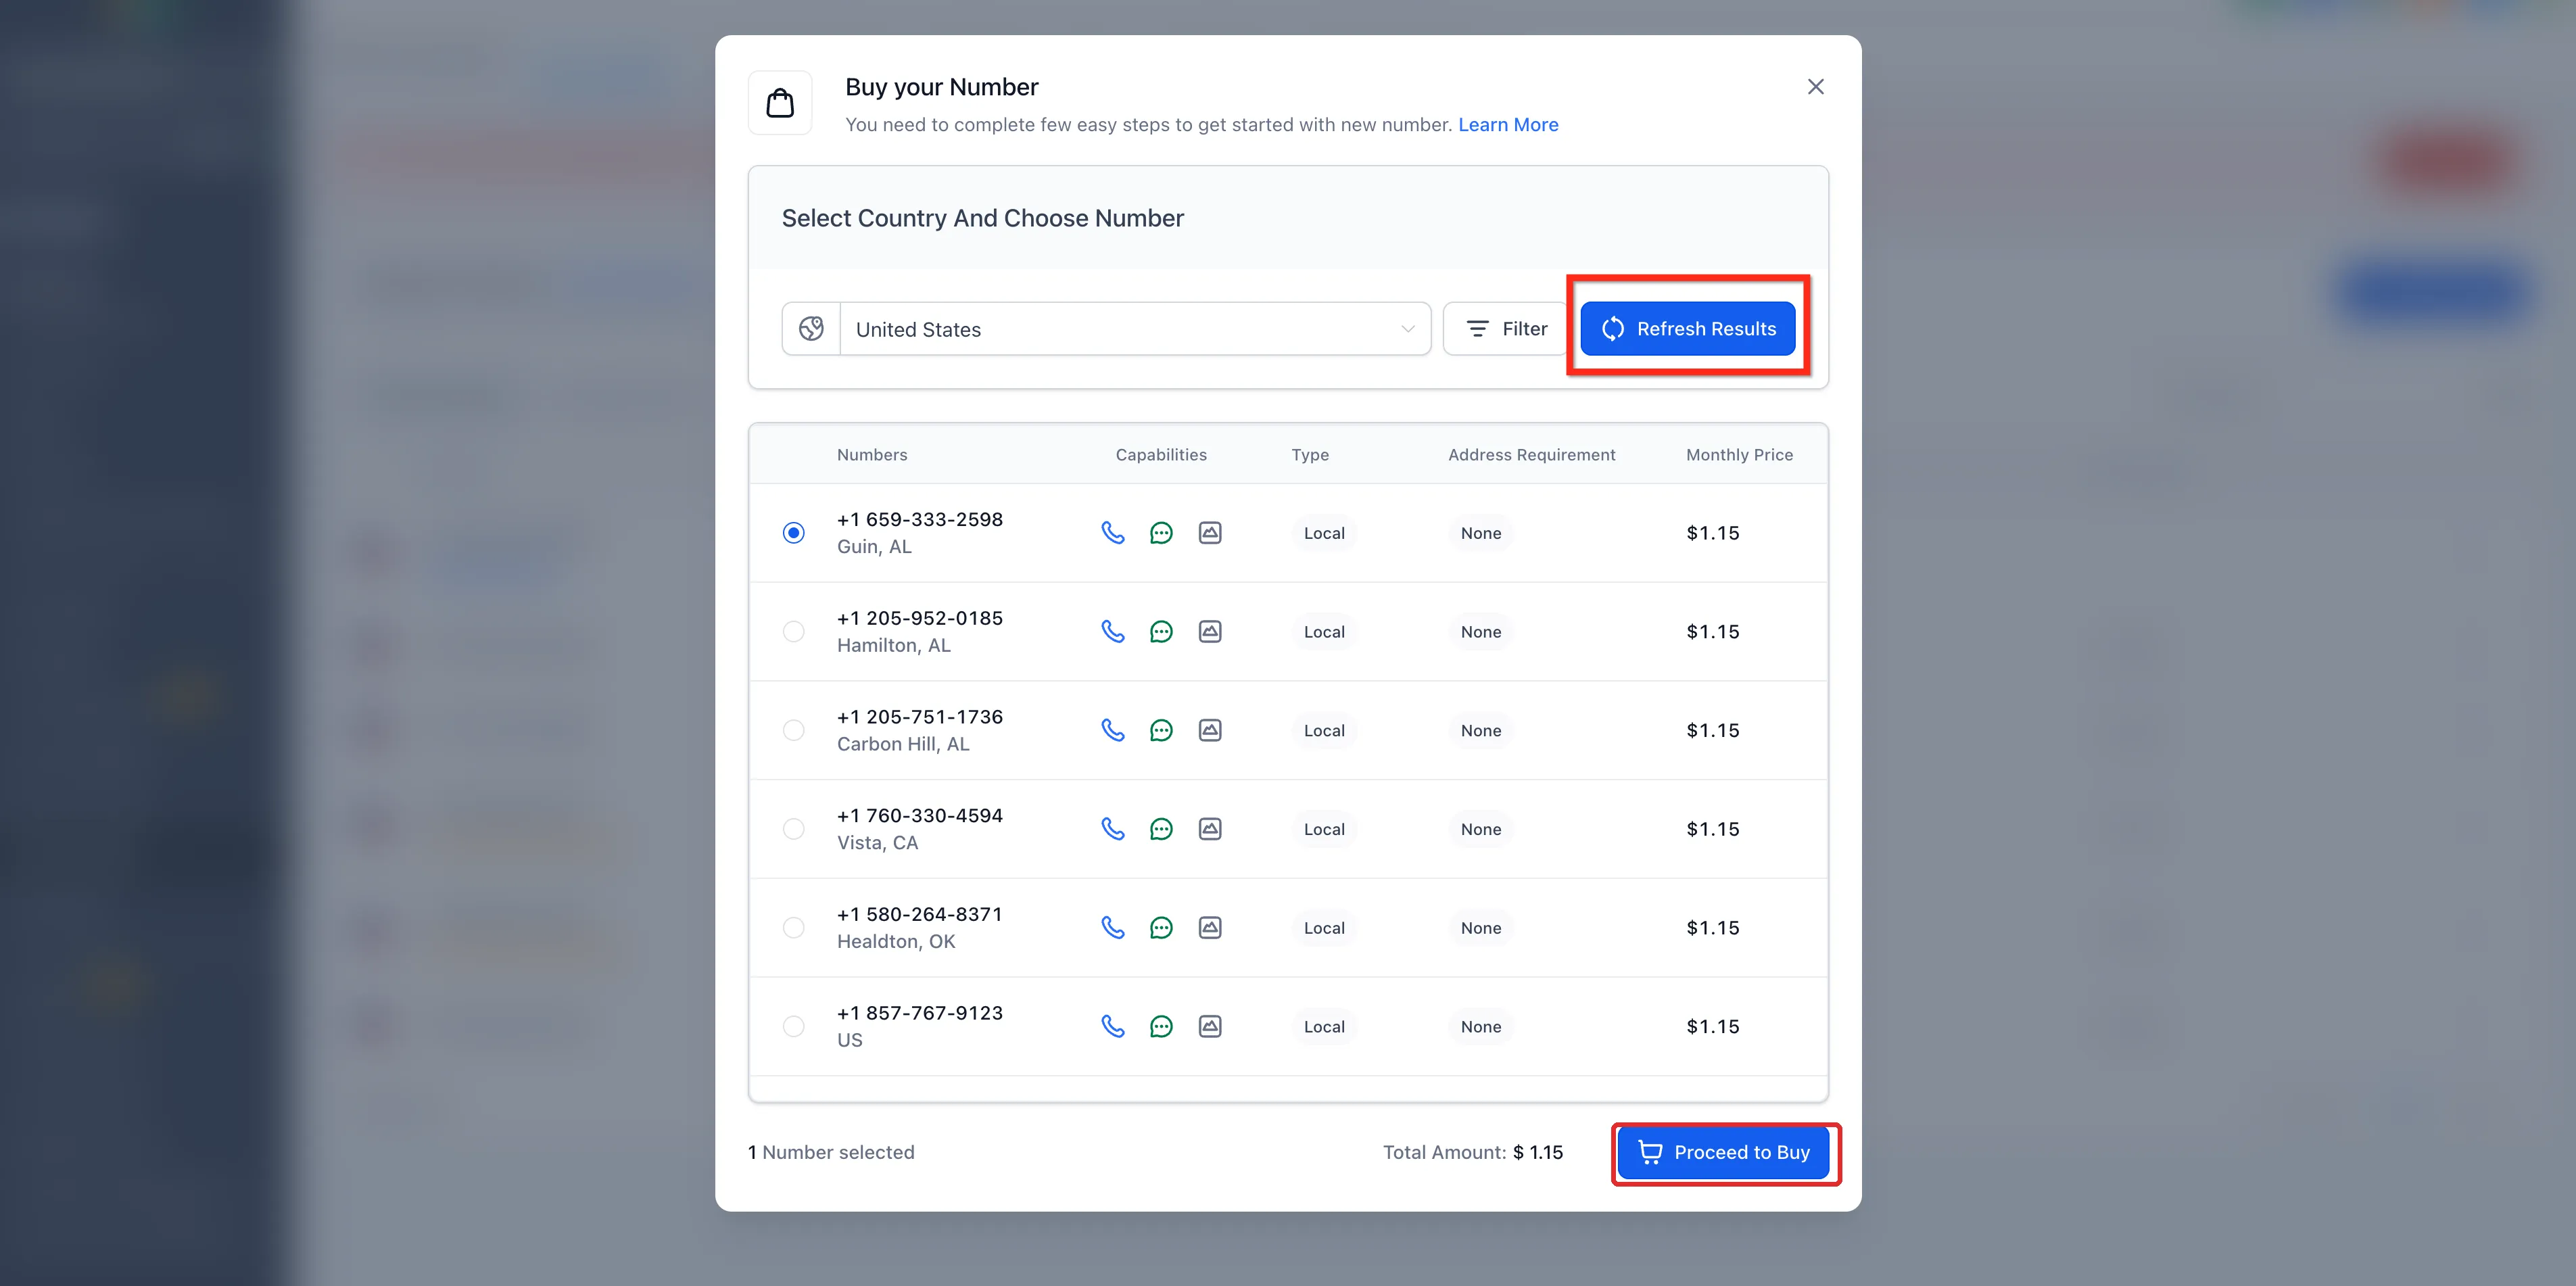
Section titled “2. Your phone number”Momentum-AI gives your business its own number for texts and calls. Everything the system sends — missed-call texts, reminders, replies — comes from this number, so customers see one consistent identity. You’ll find it under Settings → Phone System, via the Add Number button.
You’ve got a choice:
- Use a new number alongside your existing one. This is the quickest start, and what most people do.
- Move your established number into the system. Ask us about porting if you want your existing number inside.
3. Google Business Profile
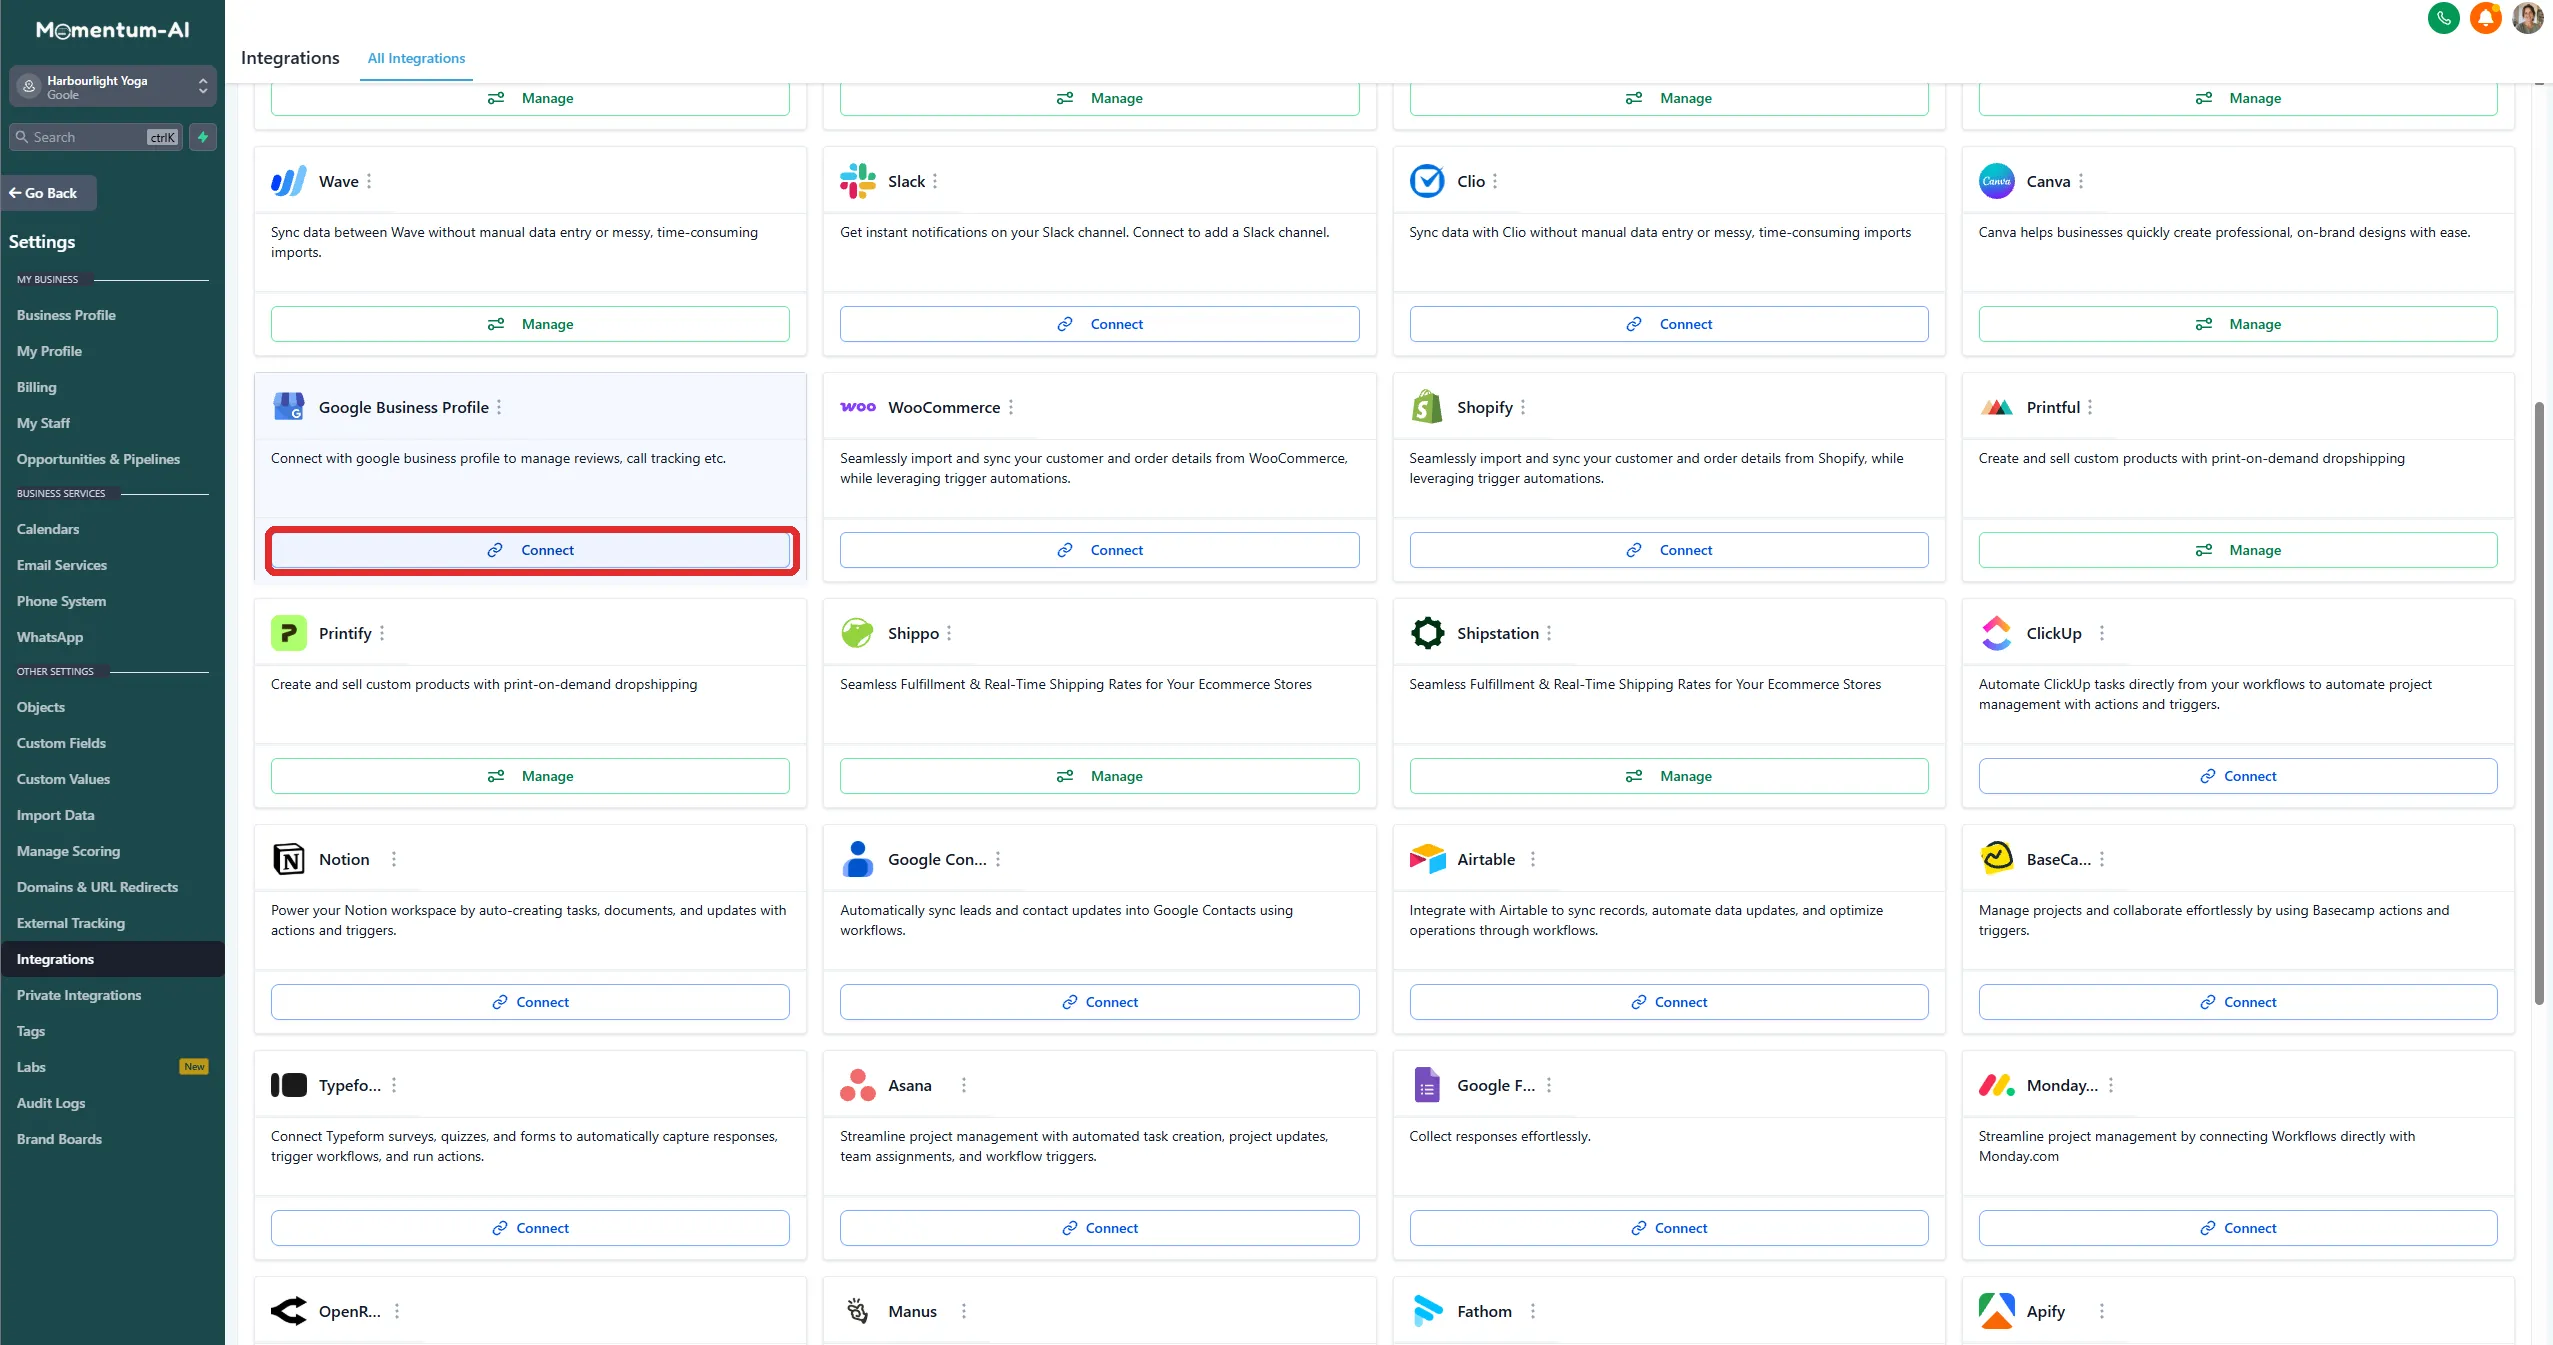
Section titled “3. Google Business Profile”Go to Integrations → Google Business Profile and authorise the connection. Log in, allow, done.
Once you’ve authorised, choose which of your Google Business Profile pages to bring in.
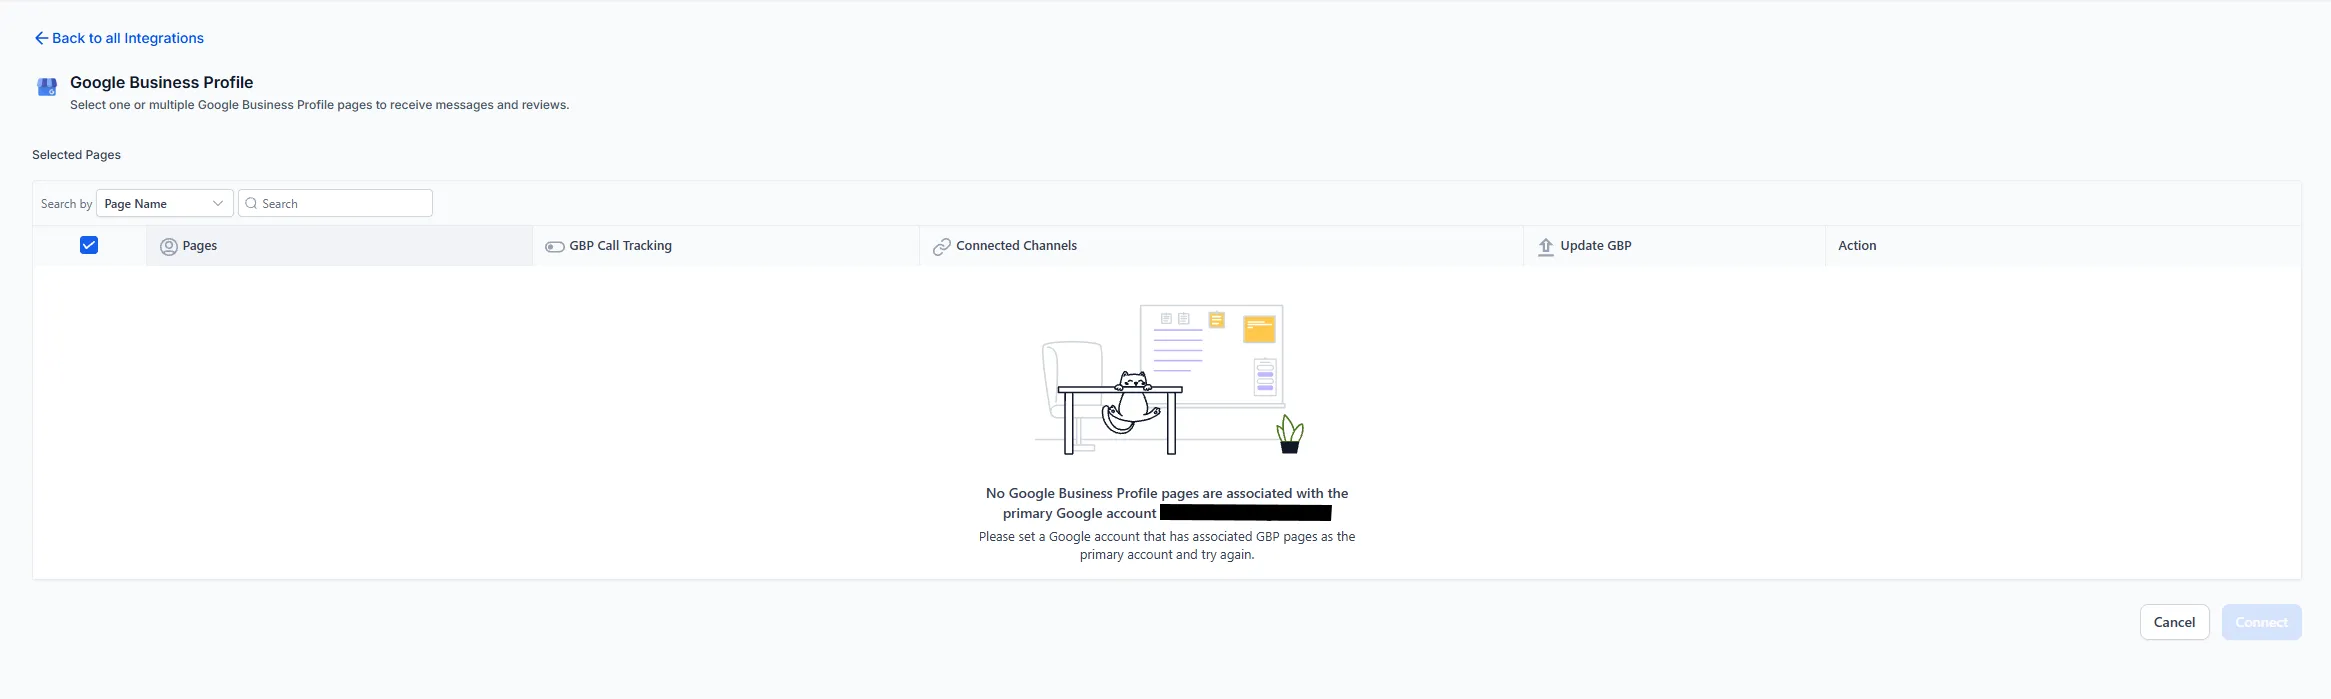
This does two things:
- Your Google reviews flow into the system, so Reviews AI can work.
- Messages people send from your Google listing land in your inbox.
4. Facebook & Instagram
Section titled “4. Facebook & Instagram”Go to Integrations → Facebook & Instagram, authorise, and choose your pages. Every DM and comment then flows into the one inbox, where your Conversation AI can pick them up.
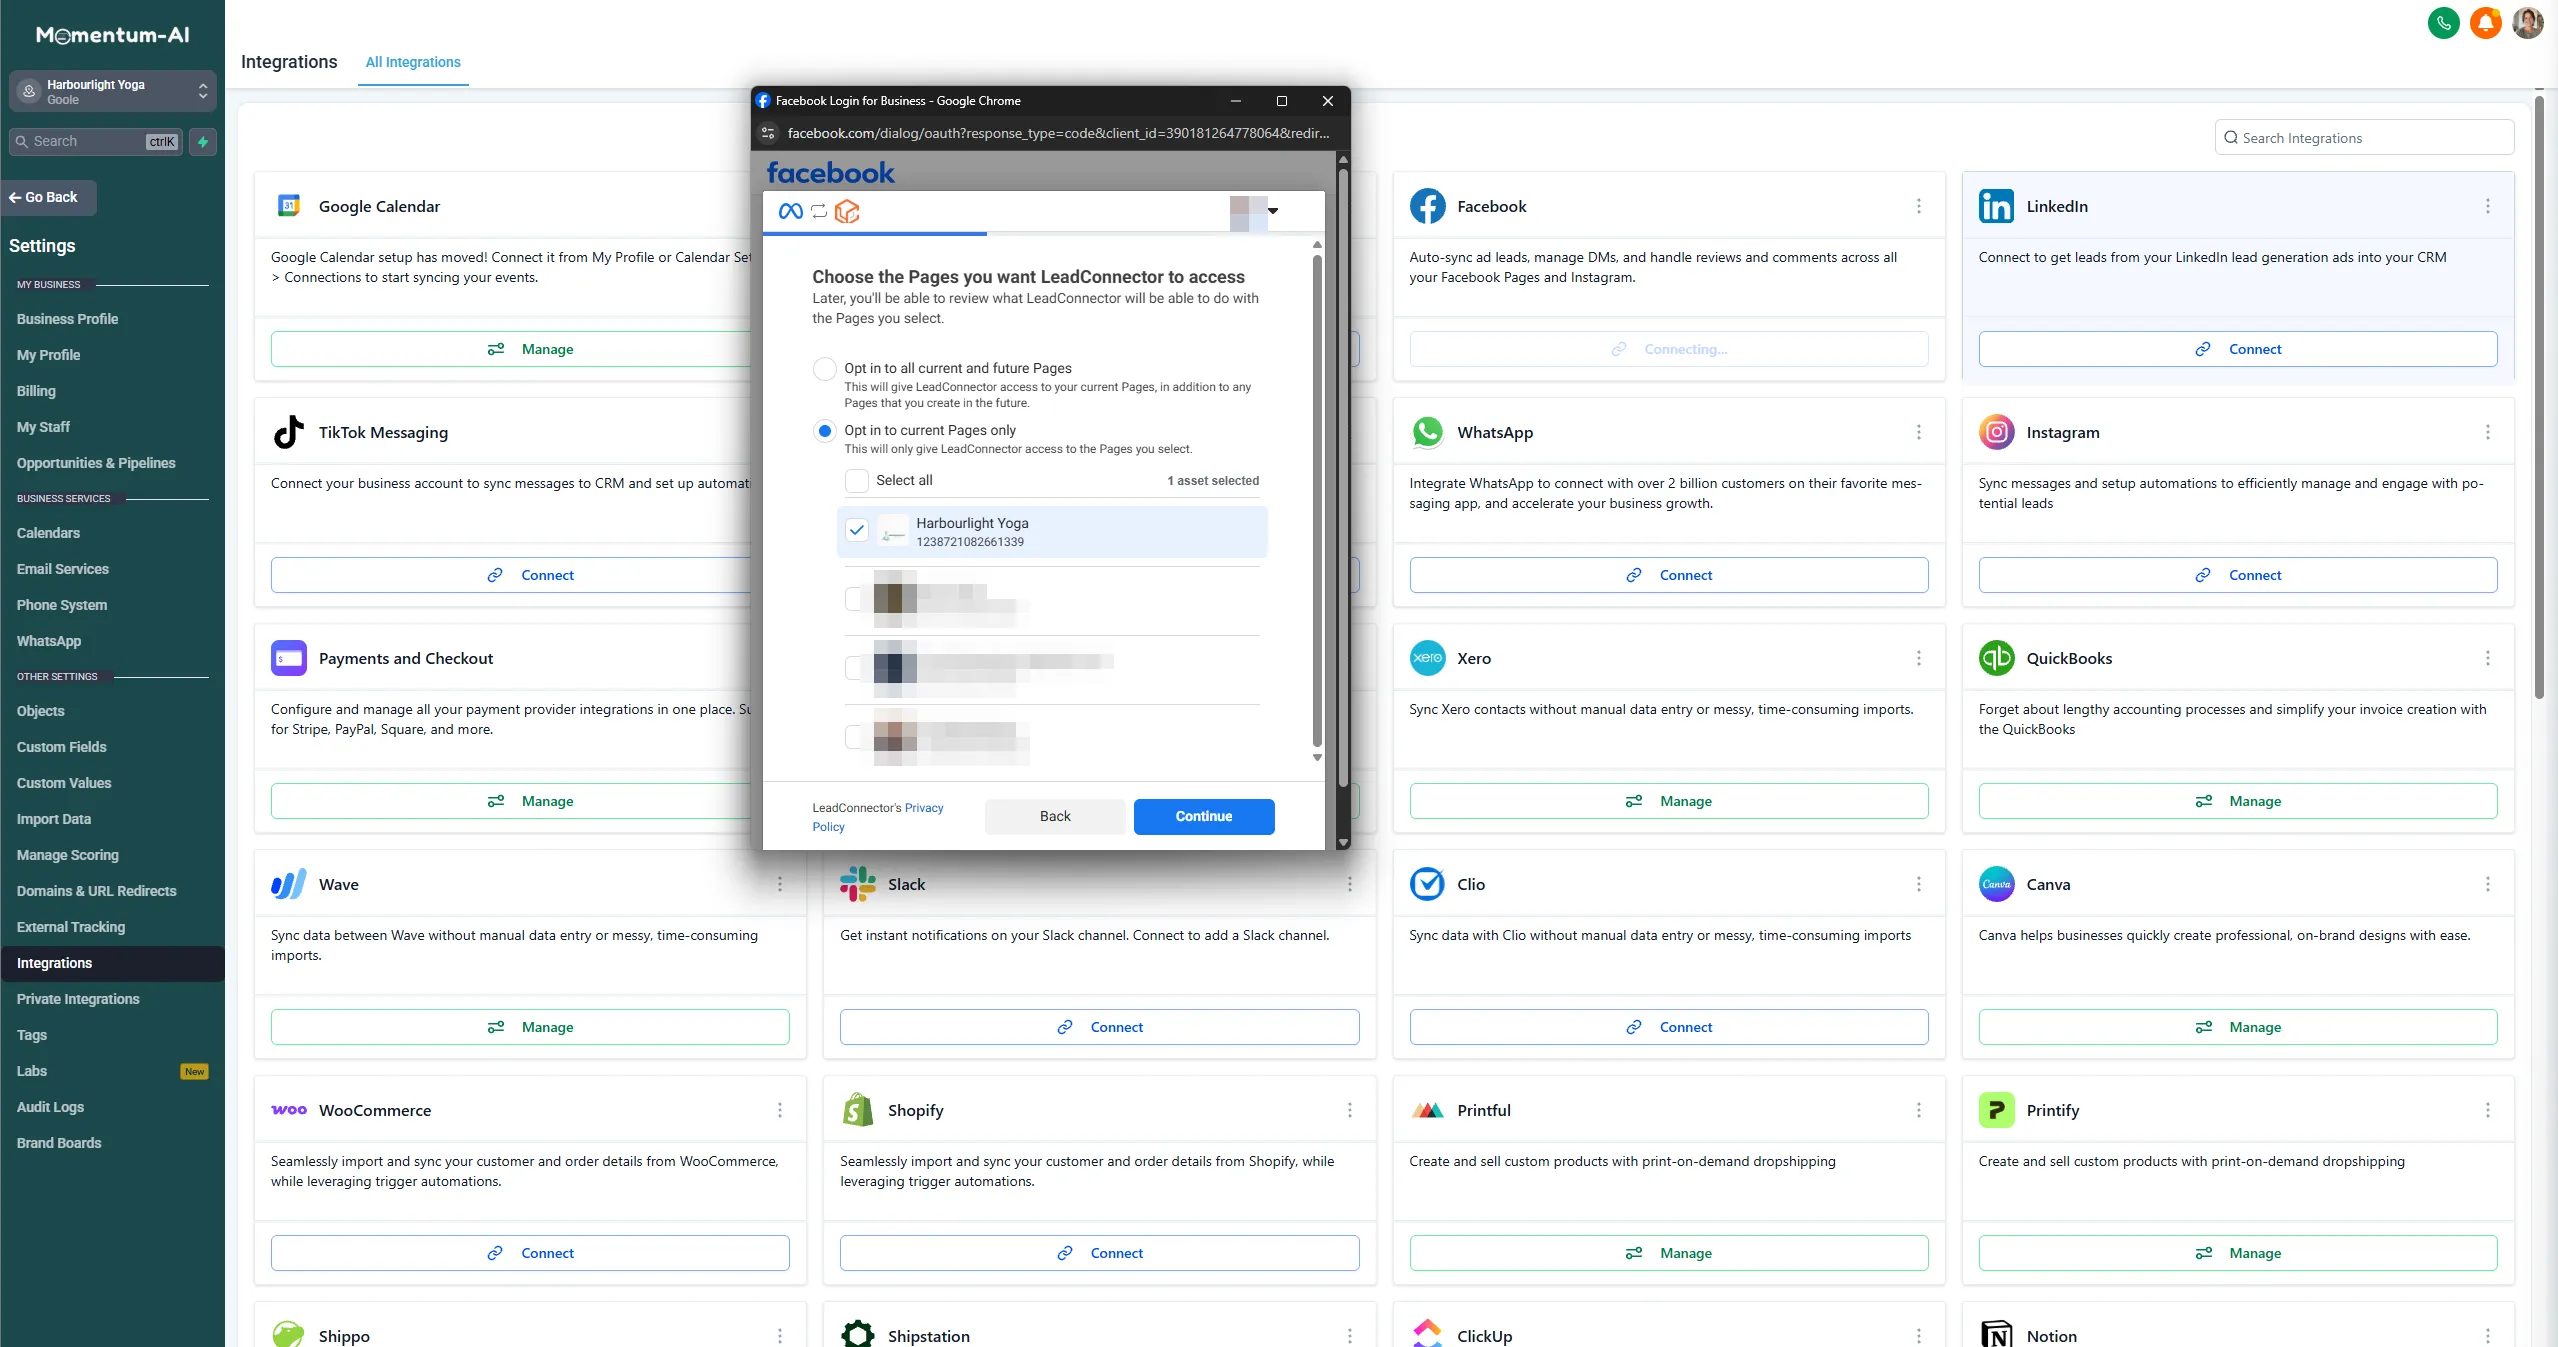
While you’re in here, connect any other channel you actually use. The test is simple: if customers message you on it, plug it in. If you don’t use it, leave it — an empty connected channel helps nobody.
Checkpoint: three tests, two minutes
Section titled “Checkpoint: three tests, two minutes”Before you move on, prove the doors are genuinely open rather than hoping they are:
-
Send yourself a test email from the system and check it lands in your inbox, not spam.
-
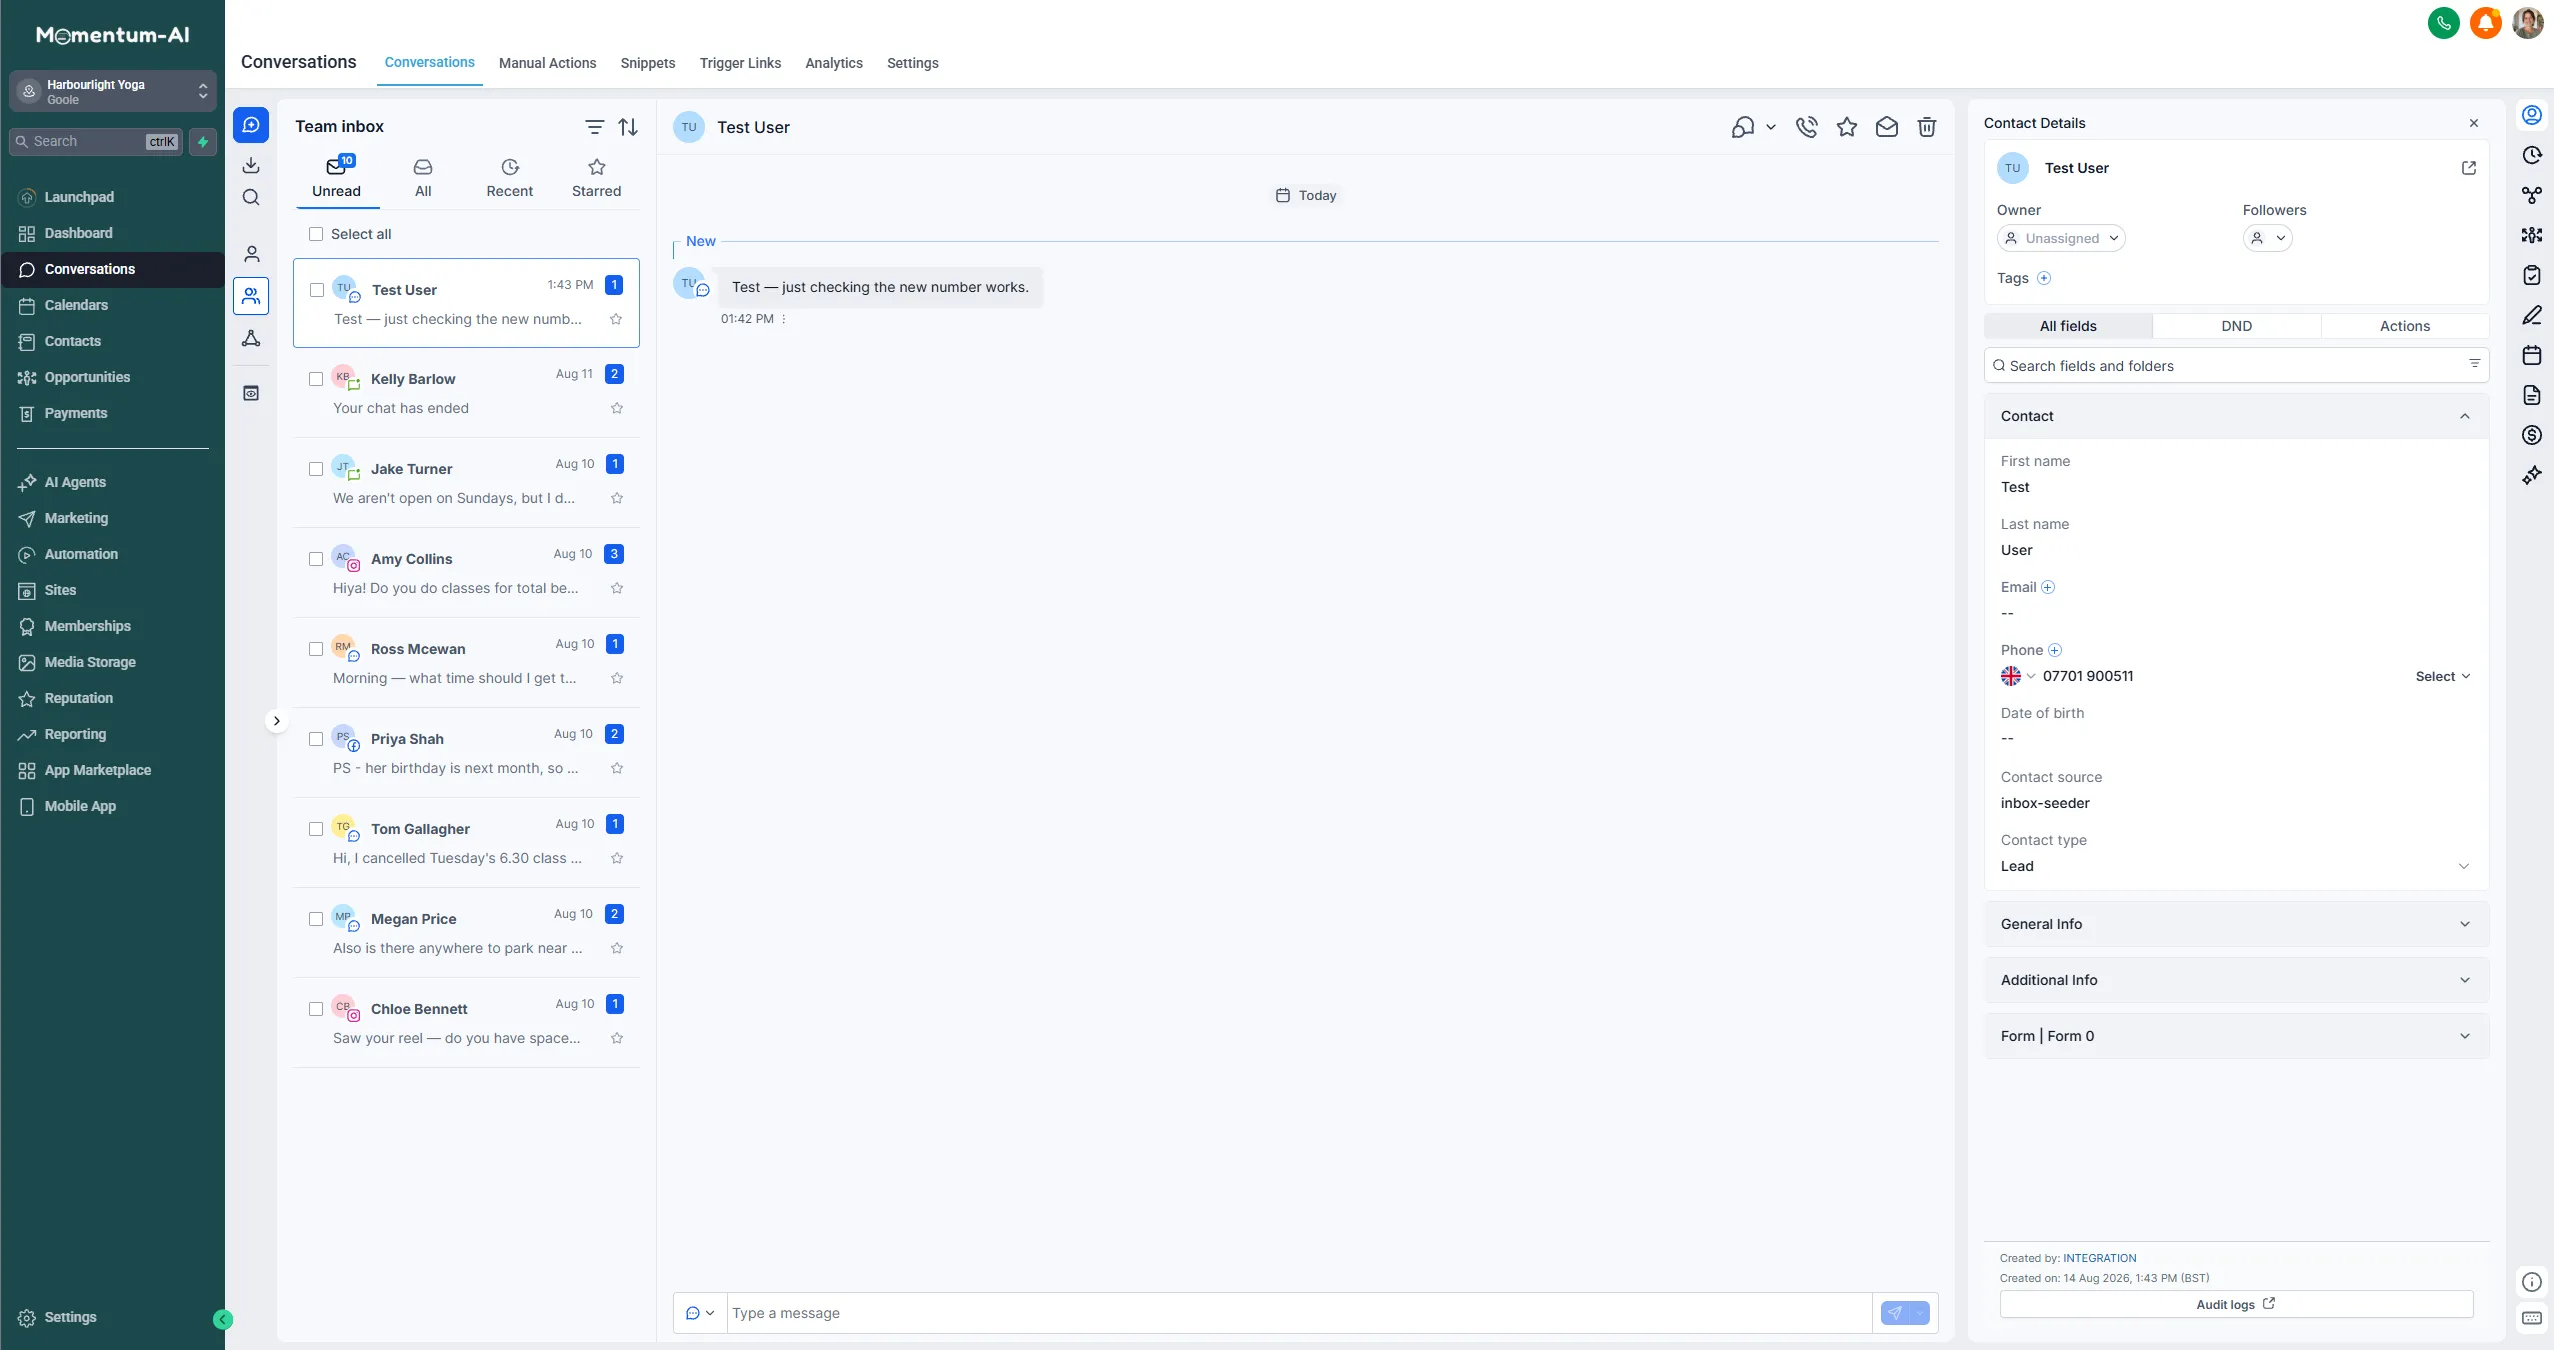
Text your new business number from your own phone and watch it appear in Conversations.
-
Send your business a DM and watch that arrive too.
If any of the three fails, contact support — don’t lose a week to a setting we can spot in five minutes.